Verifying the script recorded in Jmeter
Steps to create a Testplan and verify the scripts:
Once we recorded using the HTTP Proxy the flow using
workbench, lets make sure that the recorded flow is working.
Note: Before recording, always start the proxy then record
the flow and stop the proxy.
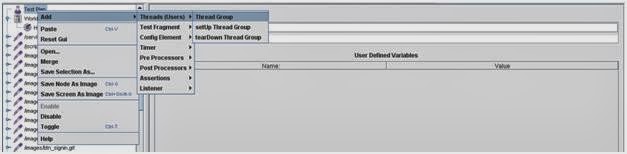
To make sure the recorded scripts are working, we need to go
to TestPlan. Add Thread Group by Right Clicking on Test Plan then Add
->Threads (Users) -> Thread Group. This is shown below:

We will come to the details in later post.
Since we are going to verify the correctness of our scripts we
will run with the default users i.e.1 user.
Copy the requests under Thread Group from HTTP Proxy server
as shown below, and then only the script creation is complete. If the requests
are under Workbench we will not be able to run them. Only when the requests are
under thread group we can execute them.

To verify the script is running properly we need to add a
Listener. To perform this, right click
on Test Plan, Click on Add -> Listener -> Comparison Assertion
Visualizer.

After adding the Comparison Assertion Visualizer, save the
script. Go to the Run menu and click on start.
After the run, Comparison Assertion Visualizer will tell us if
the request has been successfully submitted to the server and if the server has
responded with successful status codes.

If we observer the Visualizer, as shown above, all the requests
are showing Green with a tick mark. This means the request is successful. If it
shows red that means the request is unsuccessful. This is how we verify the
script is working or not after the creation of the script.

Comments
Post a Comment